Microsoft Azure Stack is a hybrid cloud platform that lets you deliver Azure services from your organization’s datacenter. Adopt hybrid cloud computing on your terms, and meet your business and technical requirements with the right combination of cloud and on-premises deployment models for your needs. Consistent Azure IaaS services go far beyond traditional virtualization. Virtual Machine Scale Sets enable rapid deployments with true auto-scaling for modern workloads. Consistent Azure PaaS services bring hybrid deployment choice and portability to cloud applications.
Microsoft Azure Stack Technical Preview 3 is being made available as a Proof of Concept (POC). On this blog , i will share about how to deployed the POC is an ideal environment for learning and demonstrating Azure Stack features. It lets we deploy all required components on a single physical machine
Scope of Azure Stack POC
- Azure Stack POC must not be used as a production environment and should only be used for testing, evaluation, and demonstration.
- Your deployment of Azure Stack is associated with a single identity provider, like Azure Active Directory or Active Directory Federation Services. You can create multiple users in this directory and assign subscriptions to each user.
- With all components deployed on the single machine, there are limited physical resources available for tenant resources. This configuration is not intended for scale or performance evaluation.
- Networking scenarios are limited due to the single host/NIC requirement.
Prerequisite
Before you deploy Azure Stack POC, make sure your computer meets with requirements >> click here to see prerequisite
Identity
Azure Stack can use either Azure Active Directory (AAD) or Active Directory Federation Services (AD FS) as an identity provider. but on this lab i use Active Directory Federation Services (AD FS) for disconnected deployments of Azure Stack. Azure Stack, resource providers, and other applications work much the same way with AD FS as they do with Azure Active Directory. Azure Stack Technical Preview 3 supports the following AD FS scenarios:
- Sign in to the POC deployment by using AD FS.
- Create a virtual machine with secrets in Key Vault
- Create a vault to store/access secrets
- Create custom RBAC roles in subscription
- Assign users to RBAC roles on resources
- Create system-wide RBAC roles through Azure PowerShell
- Sign in as a user through Azure PowerShell
- Create service principals use them to sign in to Azure PowerShell
Download and extract Azure Stack POC
- Before you start the download, make sure that your computer meets the following prerequisites:
1. The computer must have at least 60 GB of free disk space.
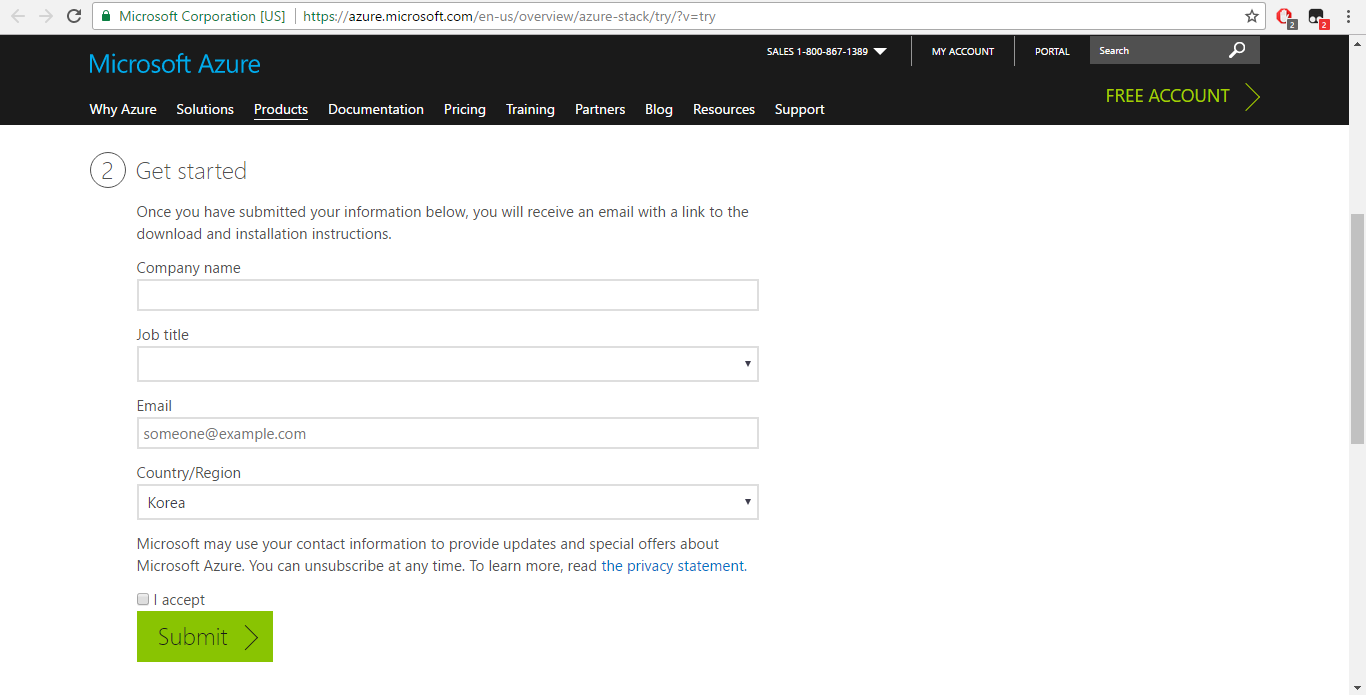
2. .NET Framework 4.6 (or a later version) must be installed. - Go to the Get Started page, provide your details, and click Submit.

- Under Download the software, click Azure Stack Technical Preview 3.
- Run the downloaded AzureStackDownloader.exe file.
- After the download completes, click Run to launch the MicrosoftAzureStackPOC.exe.
- Review the License Agreement screen and information of the Self-Extractor Wizard and then click Next.
- Review the Privacy Statement screen and information of the Self-Extractor Wizard and then click Next.
- Select the Destination for the files to be extracted, click Next.
- Review the Destination location screen and information of the Self-Extractor Wizard, and then click Extract to extract the CloudBuilder.vhdx (~35 GB) and ThirdPartyLicenses.rtf files. This will take some time to complete.
Prepare the POC host
- Make sure that you can physically connect to the POC host, or have physical console access (such as KVM ). You will need such access after you reboot the POC host
- Make sure the POC host meets the minimum requirements. You can use the Deployment Checker for Azure Stack to confirm your requirements.
- Sign in as the Local Administrator to your POC host.
- Copy or move the CloudBuilder.vhdx file to the root of the C:\ drive (C:\CloudBuilder.vhdx).
- On the POC host, run the following PowerShell script to download the Azure Stack support files:
# Variables
$Uri = ‘https://raw.githubusercontent.com/Azure/AzureStack-Tools/master/Deployment/’
$LocalPath = ‘c:\AzureStack_SupportFiles’
# Create folder
New-Item $LocalPath -type directory
# Download files
( ‘BootMenuNoKVM.ps1’, ‘PrepareBootFromVHD.ps1’, ‘Unattend.xml’, ‘unattend_NoKVM.xml’) | `
foreach { Invoke-WebRequest ($uri + $_) -OutFile ($LocalPath + ‘\’ + $_) }
- Open an elevated PowerShell console and change the directory to where you copied the support files.
- Run the PrepareBootFromVHD.ps1 script. This script and the unattend files are available with the other support scripts provided along with this build. There are five parameters for this PowerShell script:
.\PrepareBootFromVHD.ps1 -CloudBuilderDiskPath C:\CloudBuilder.vhdx -ApplyUnattend

- When the script is complete, you must confirm the reboot.
- The POC host reboots into the OS of the CloudBuilder.vhdx, where the deployment continues.
Run the PowerShell deployment script
- Sign in as the Local Administrator to the POC host .
- Open an elevated PowerShell console.
- In PowerShell, run this command: cd C:\CloudDeployment\Setup.
- To deploy the Azure Stack POC with Active Directory Federation Services instead, run the following script (you just need to add the -UseADFS parameter)
$adminpass = ConvertTo-SecureString “〈LOCAL_ADMIN_PASSWORD〉” -AsPlainText -Force
.\InstallAzureStackPOC.ps1 -AdminPassword $adminpass -UseADFS
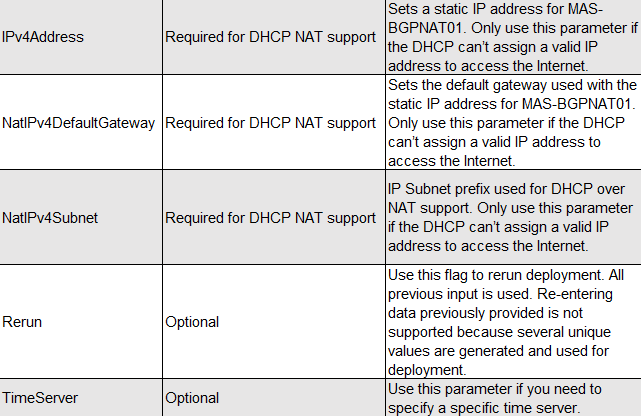
- If your environment DOESN’T have DHCP enabled, you must include the following ADDITIONAL parameters to one of the options above (example usage provided):
.\InstallAzureStackPOC.ps1 -AdminPassword $adminpass
-NatIPv4Subnet 10.10.10.0/24 -NatIPv4Address 10.10.10.3 -NatIPv4DefaultGateway 10.10.10.1
Parameters:

Note : if you not use parameter timeserver you will connect to default time server to time.windows.com

- The deployment process can take a few hours, during which the system automatically reboots once.
- If you want to monitor the deployment progress after restart, sign in as azurestack\AzureStackAdmin. If you sign in as a local admin after the machine is joined to the domain, you won’t see the deployment progress

- finish After 7hr 🙂

The following table shows how to connect to the portals and to Resource Manager endpoints in an Azure Stack Proof of Concept (POC) environment.
| Portal | Portal URL |
| Administrator | https://adminportal.local.azurestack.external |
| User | https://portal.local.azurestack.external |


Thank You 🙂
Reference: https://docs.microsoft.com/en-us/azure/azure-stack/azure-stack-poc